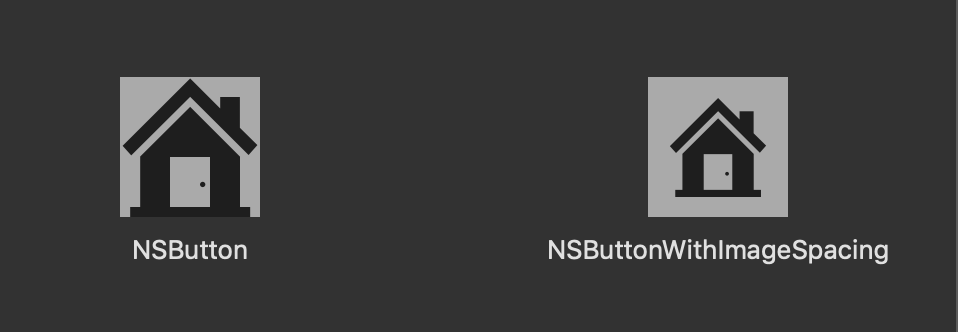
This post presents a subclass of NSButton with image padding. Following the method in this post will allow you to add spacing between the frame of a NSButton and the button image.
Subclass NSButton
The first step is to subclass NSButton and prepare to modify the draw(dirtyRect:) function. Similar to UIEdgeInsets on iOS, the NSButtonWithImageSpacing subclass will expose two variables to allow for image insets on an NSButton.
@IBDesignable class NSButtonWithImageSpacing: NSButton {
    // Expose the padding as @IBInspectable to allow padding to be
    // set in a Storyboard
    @IBInspectable var verticalImagePadding: CGFloat = 0
    @IBInspectable var horizontalImagePadding: CGFloat = 0
}
Override Draw
The next step is to override draw(dirtyRect:) and modify the bounds before the draw call. Doing so will draw the button content in a smaller CGRect than the button frame, giving the button image padding.
@IBDesignable class NSButtonWithImageSpacing: NSButton {
    @IBInspectable var verticalImagePadding: CGFloat = 0
    @IBInspectable var horizontalImagePadding: CGFloat = 0

    override func draw(_ dirtyRect: NSRect) {
        // Reset the bounds after drawing is complete
        let originalBounds = self.bounds
        defer { self.bounds = originalBounds }

        // Inset bounds by the image padding
        self.bounds = originalBounds.insetBy(
            dx: horizontalImagePadding,
            dy: verticalImagePadding
        )

        // Draw the button content with padding
        super.draw(dirtyRect)
    }
}
NSButton With Image Padding
That’s it! With the NSButtomWithImageSpacing implementation you can achieve the following results:
